content
I. Verify Complete Accessories
II. Basic Connections
III. Initial Configuration
IV. Automatic Completion Phase
V. After-Sales Support
FAQ
Dear Customer, thank you very much for choosing the we2usat k3 pro+ TV Box! To help you get started quickly and enjoy a smooth user experience, we have prepared a detailed step-by-step setup guide. From basic connections to initial configuration, each step is clearly explained—even if you’re operating it for the first time, you can complete the setup easily.
For the graphic version, please follow this article.
I. Verify Complete Accessories
Before starting the setup, please check if the we2usat k3 pro+ package contains the following accessories (if any items are missing, contact customer service immediately):
● 1 x we2usat k3 pro+ Main Unit
● 1 x Power Adapter
● 1 x HDMI High-Definition Data Cable
● 1 x Bluetooth Voice Remote Control
● 1 x Product Manual
II. Basic Connections
This step involves connecting the main unit to the power supply and display device—this is critical to ensuring the device starts normally. Follow the order below to operate:
Step 1: Connect the Power Supply
1. First, firmly insert the DC plug (round thin plug) of the power adapter into the “Power Port” on the back of the we2usat k3 pro+ main unit. Gently twist the plug to ensure a tight fit and avoid poor contact.
2. Then, insert the AC plug (flat plug) of the power adapter into a valid power outlet at home (it is recommended to use an outlet with an independent switch for easier power-off later).
3. After plugging in, the “Power Indicator Light” on the side of the main unit will turn on (usually red in standby mode), indicating a successful power connection.
Step 2: Install Batteries in the Remote Control
4. According to the “positive and negative polarity markings” inside the battery compartment (positive “+” upwards, negative “-” downwards), insert 2 AAA batteries into the compartment. Be careful not to reverse the polarity—reversing the batteries will prevent the remote from powering on and may even damage the circuit.
5. The “indicator light” on the front of the remote control will flash, indicating that the remote is powered on normally.
Step 3: Connect to the Display Device
Based on the interface type of your home TV/monitor, select the corresponding data cable for connection. Choose one of the two methods below:
Method A: HDMI High-Definition Connection
● Take out the HDMI cable from the package. Insert one end into the “HDMI Port” on the back of the we2usat k3 pro+ main unit, and the other end into the “HDMI Input Port” of your TV/monitor.
● After connection, turn on the TV/monitor. Use the TV remote to press the “Source” or “Input Selection” button, and select the HDMI port you just plugged into (e.g.“HDOUT”). At this point, the TV screen will display a “Waiting for device signal” prompt—once the main unit is turned on later, the screen will sync.If you are unsure, you can follow the"WE2UAST interface description".
Method B: AV Composite Connection (for older devices)
● If your TV/monitor has no HDMI port, use an AV cable: One end of the AV cable has “three-color connectors” (red and white for audio, yellow for video). Insert them into the “AV Port” on the back of the main unit, matching the connector colors to the port colors (do not reverse them).
● Insert the three-color connectors at the other end into the “AV Input Port” of the TV/monitor. Similarly, use the TV remote to switch the signal source to “AV Mode” (some TVs are labeled “Video 1/2”) to ensure the screen can receive the image normally.
III. Initial Configuration
After the hardware is connected, follow the on-screen setup wizard to configure the software.
Step 1: Start the Main Unit
1. Press the “Power” button on the we2usat Bluetooth remote. The main unit’s power indicator should change from red to blue, and the device will begin to start up.
2. The we2usat logo and startup animation will appear on your TV screen. Please be patient during this process and do not disconnect power, as this could damage the system.

Step 2: Pair the Remote Control
1. After the startup animation, a “Please Pair Remote Control” prompt will appear on the screen with instructions.
2. Press and hold both the 【OK】 button (the round center button) and the 【-】 (Volume Down) button on the remote simultaneously. Do not release them. The pairing indicator light on the remote will blink rapidly, indicating it’s in pairing mode.
3. After 5-10 seconds, the screen will display a “Remote Connected Successfully” pop-up. You can now release the buttons. The remote is now paired and can control the cursor on the screen.
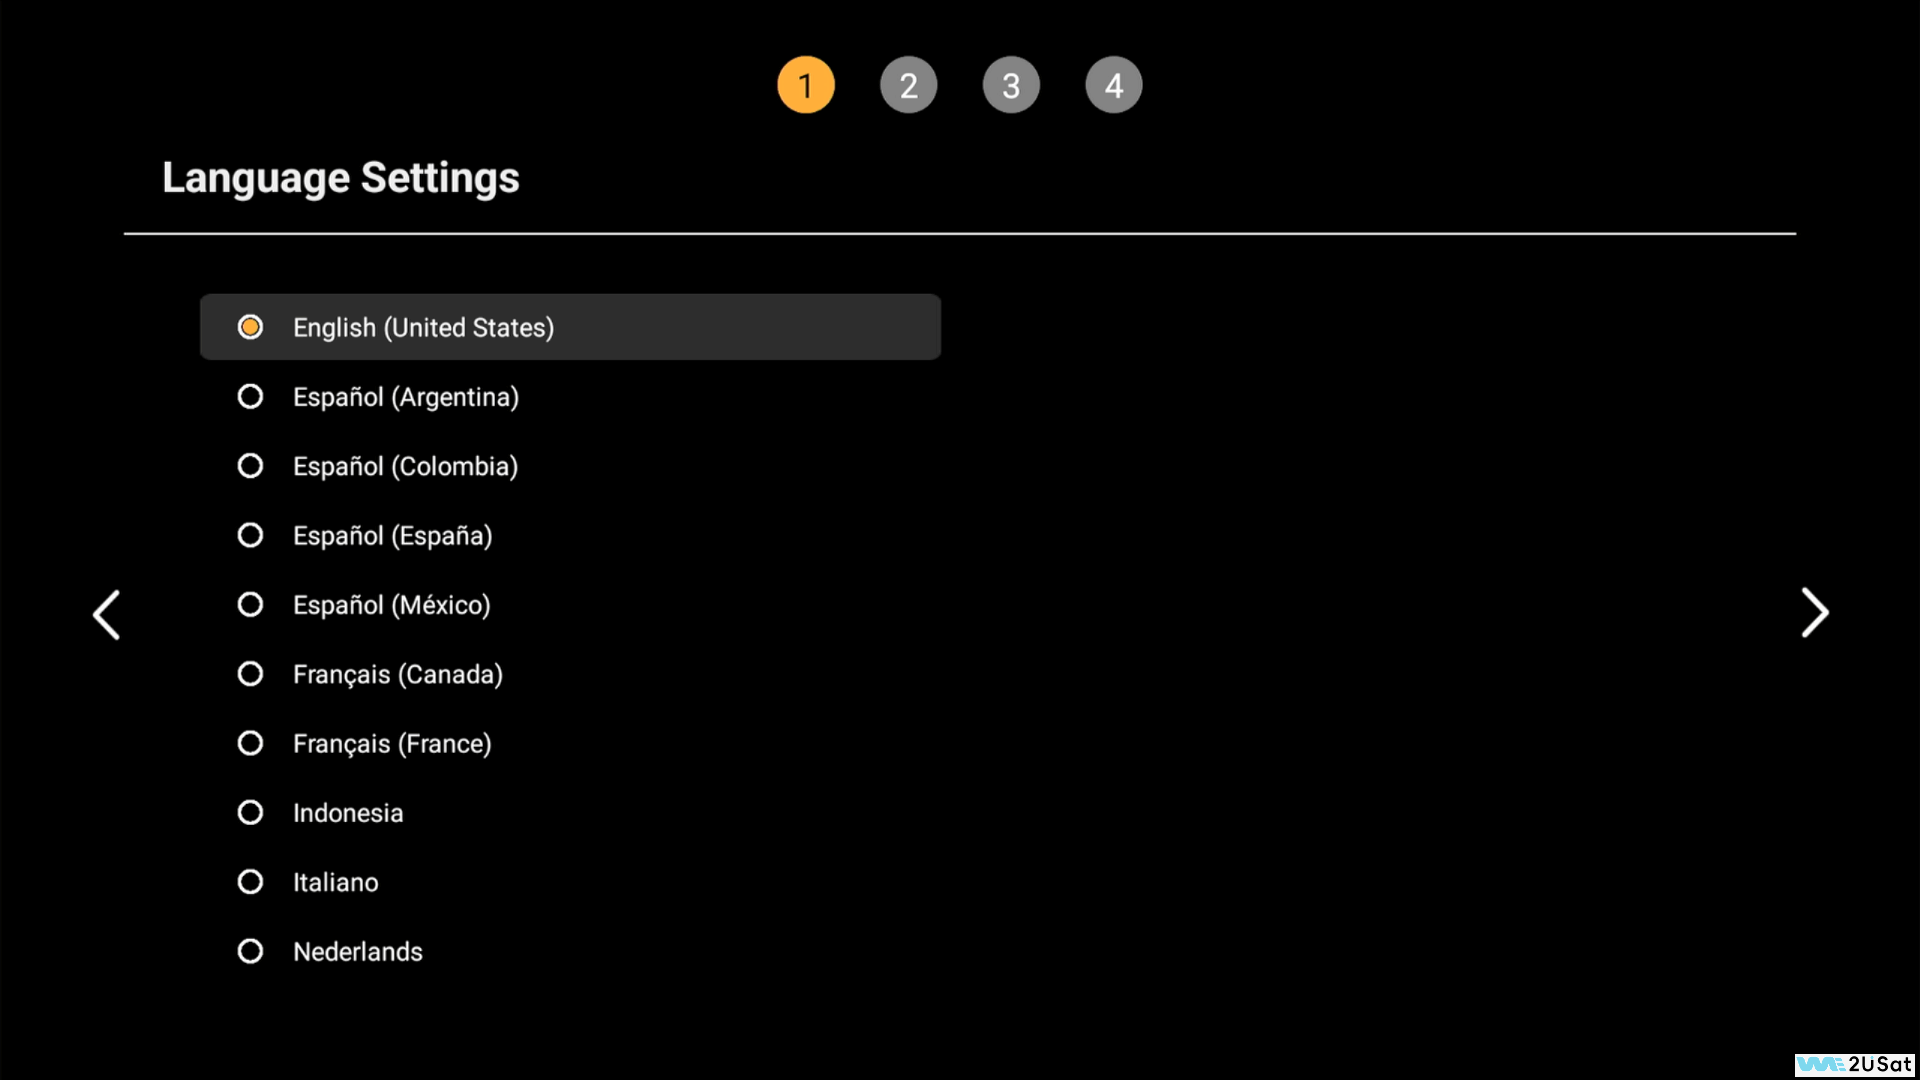
Step 3: Select System Language
1. After successful pairing, you will enter the “Language Selection” screen.
2. Use the 【Up/Down】 arrow keys on the remote to highlight your preferred language.
3. Press the 【OK】 button to confirm your selection. The system will save the language setting and proceed to the next step.
Step 4: Adjust Screen Size
1. You will enter the “Screen Adjustment” interface, which displays a rectangle with a white border.
2. Use the 【Left/Right】 arrow keys to adjust the border size until it perfectly aligns with the edges of your TV screen (no black borders should be visible, and no content should be cut off).
3. Use the 【Up/Down】 arrow keys to highlight the “NEXT” option and press 【OK】 to continue.
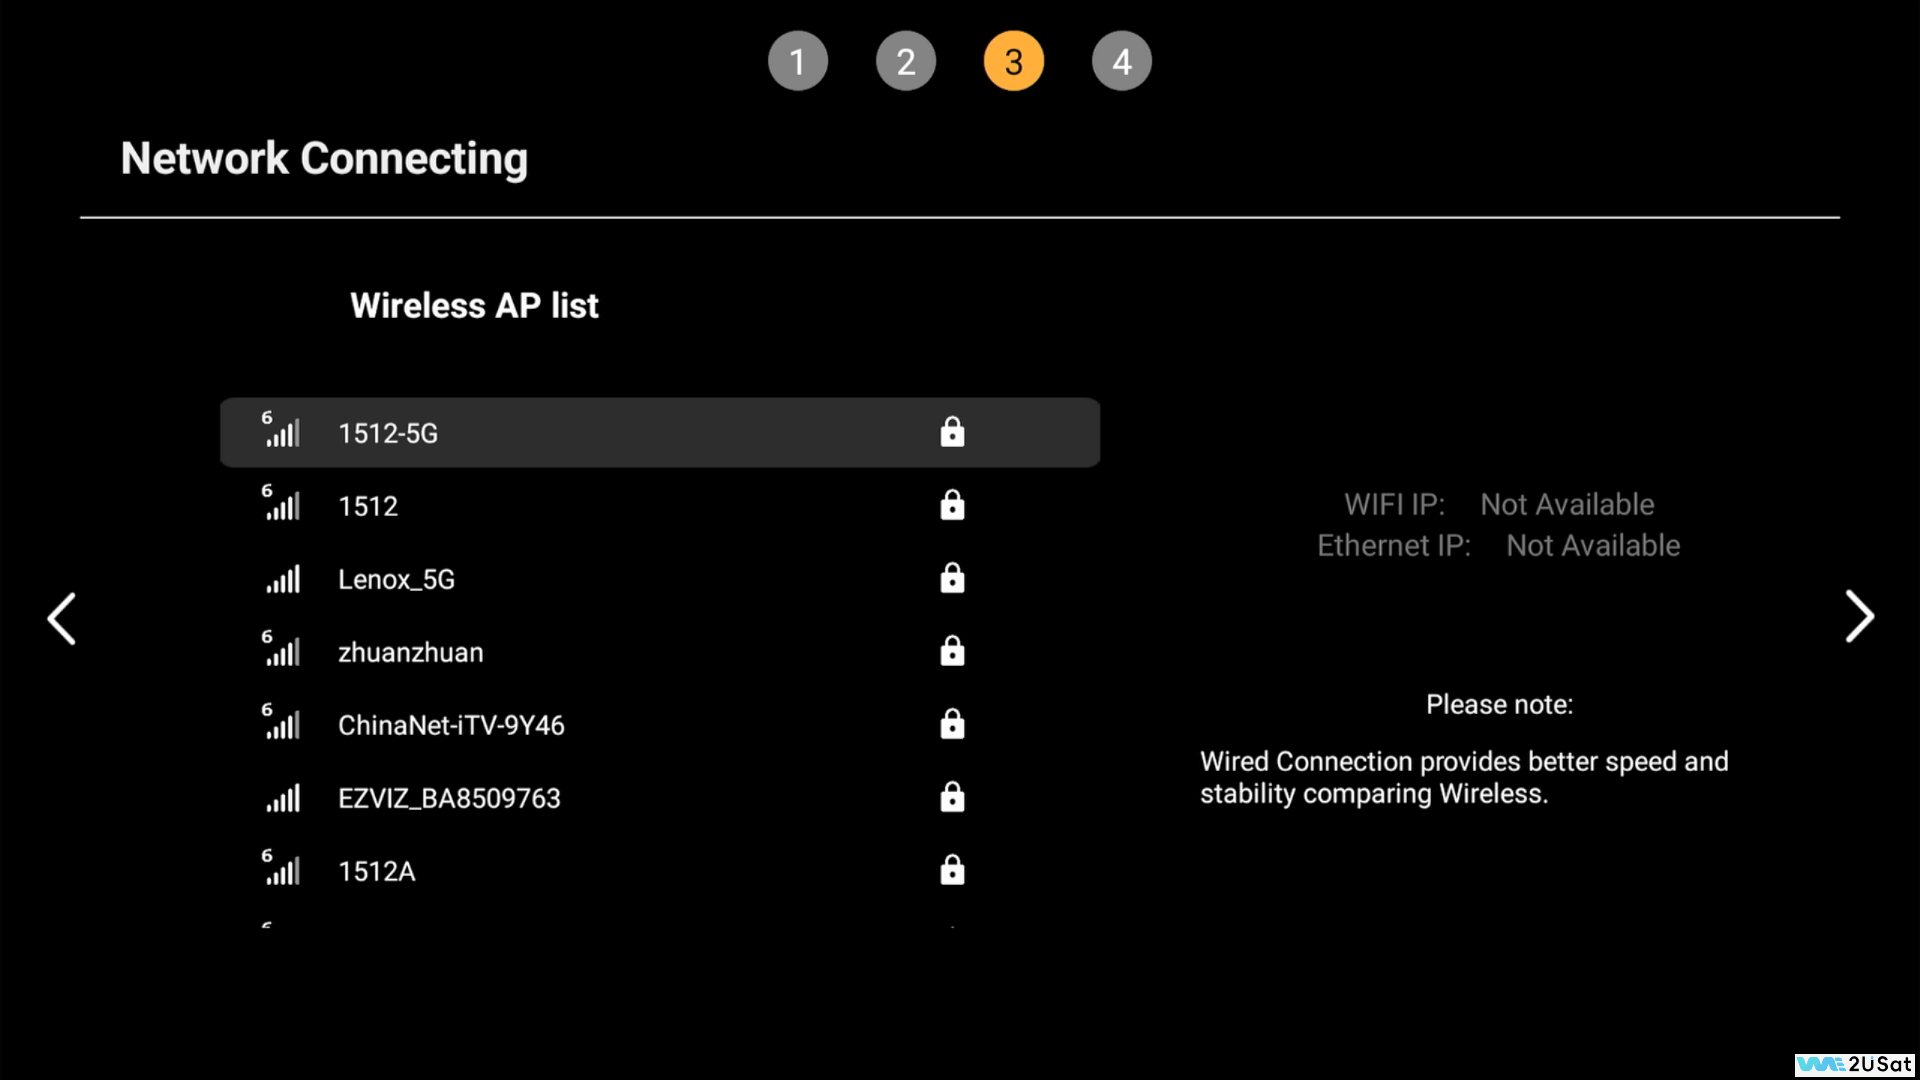
Step 5: Connect to Network
1. The “WiFi Network Selection” screen will appear, automatically scanning for available WiFi networks (showing network names and signal strength).
2. Use the 【Up/Down】 arrow keys to select your home WiFi network (SSID).
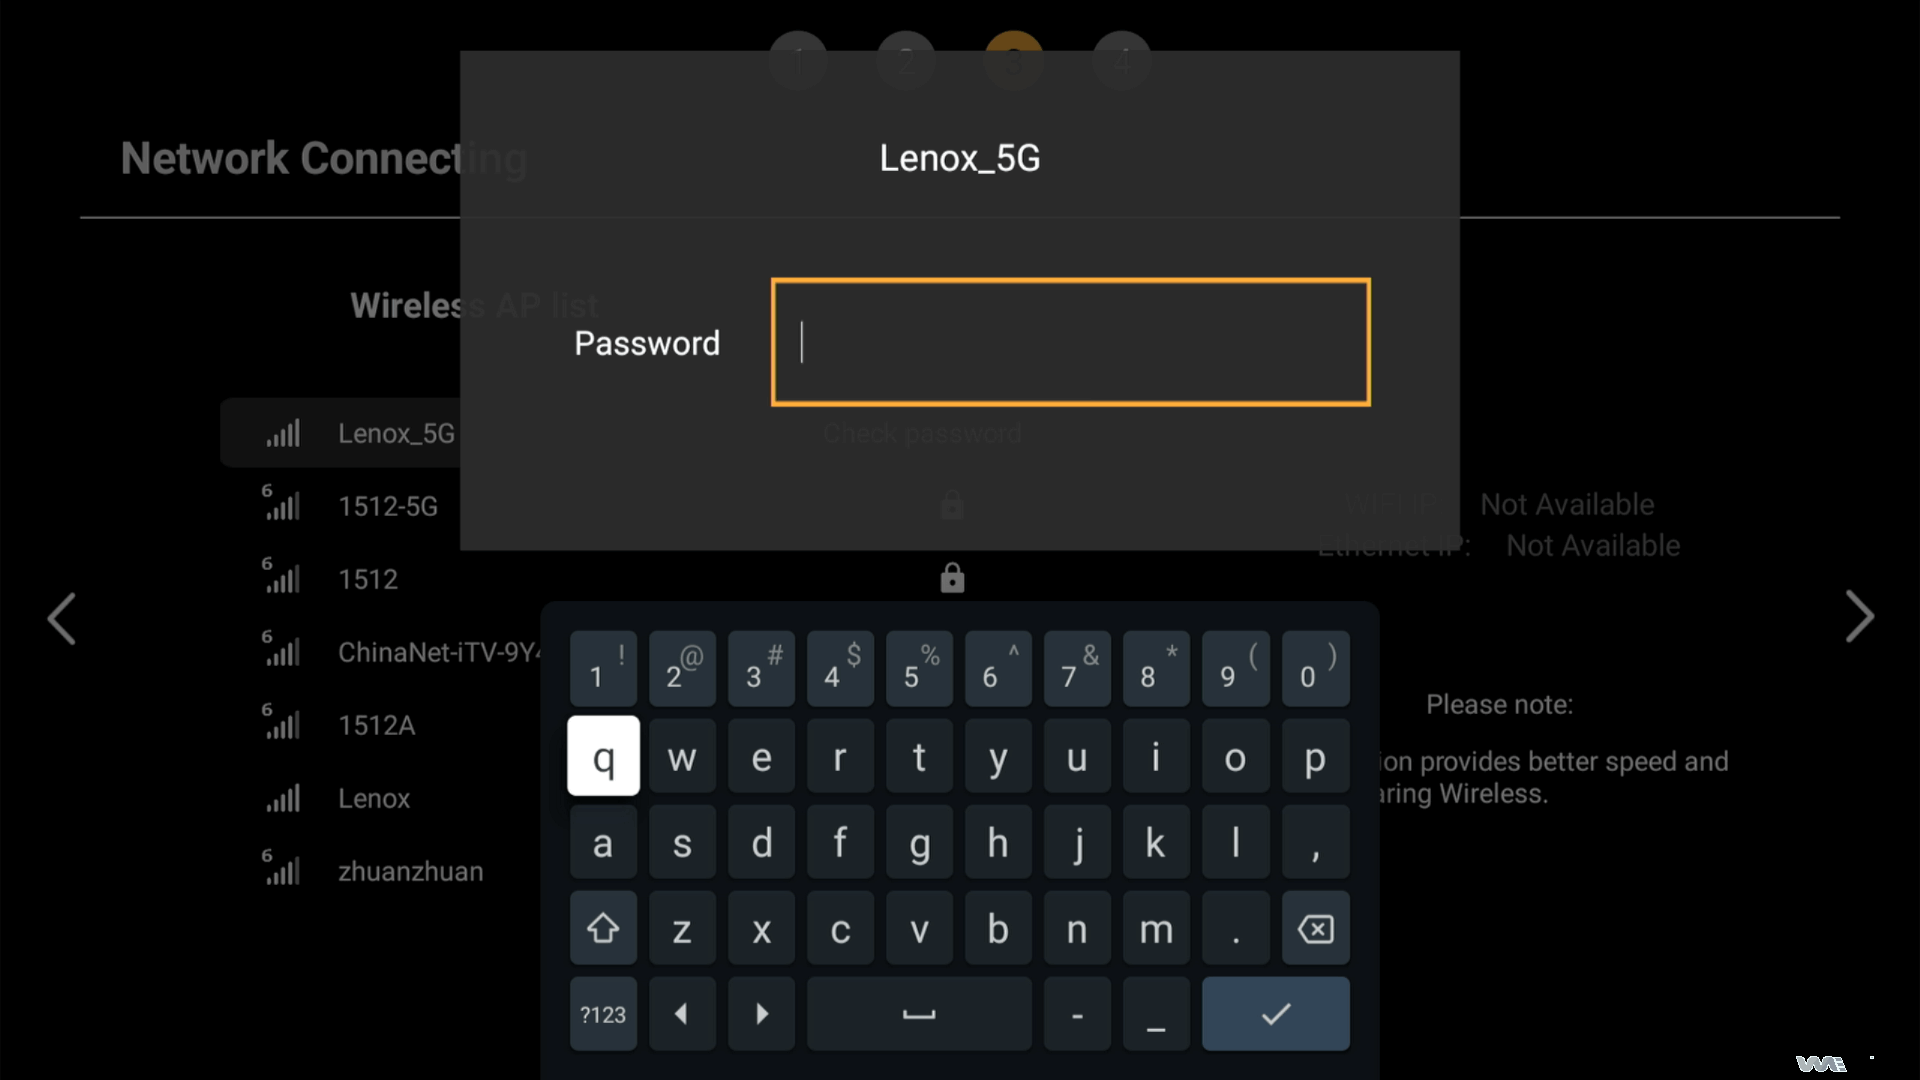
3. Press 【OK】, and an “Enter WiFi Password” dialog box will pop up. Use the arrow keys to navigate the on-screen keyboard and enter your password.
4. Once the password is entered, press the 【Down】 arrow key to highlight the “Connect” button and press 【OK】 to submit. The device will now connect to your network.
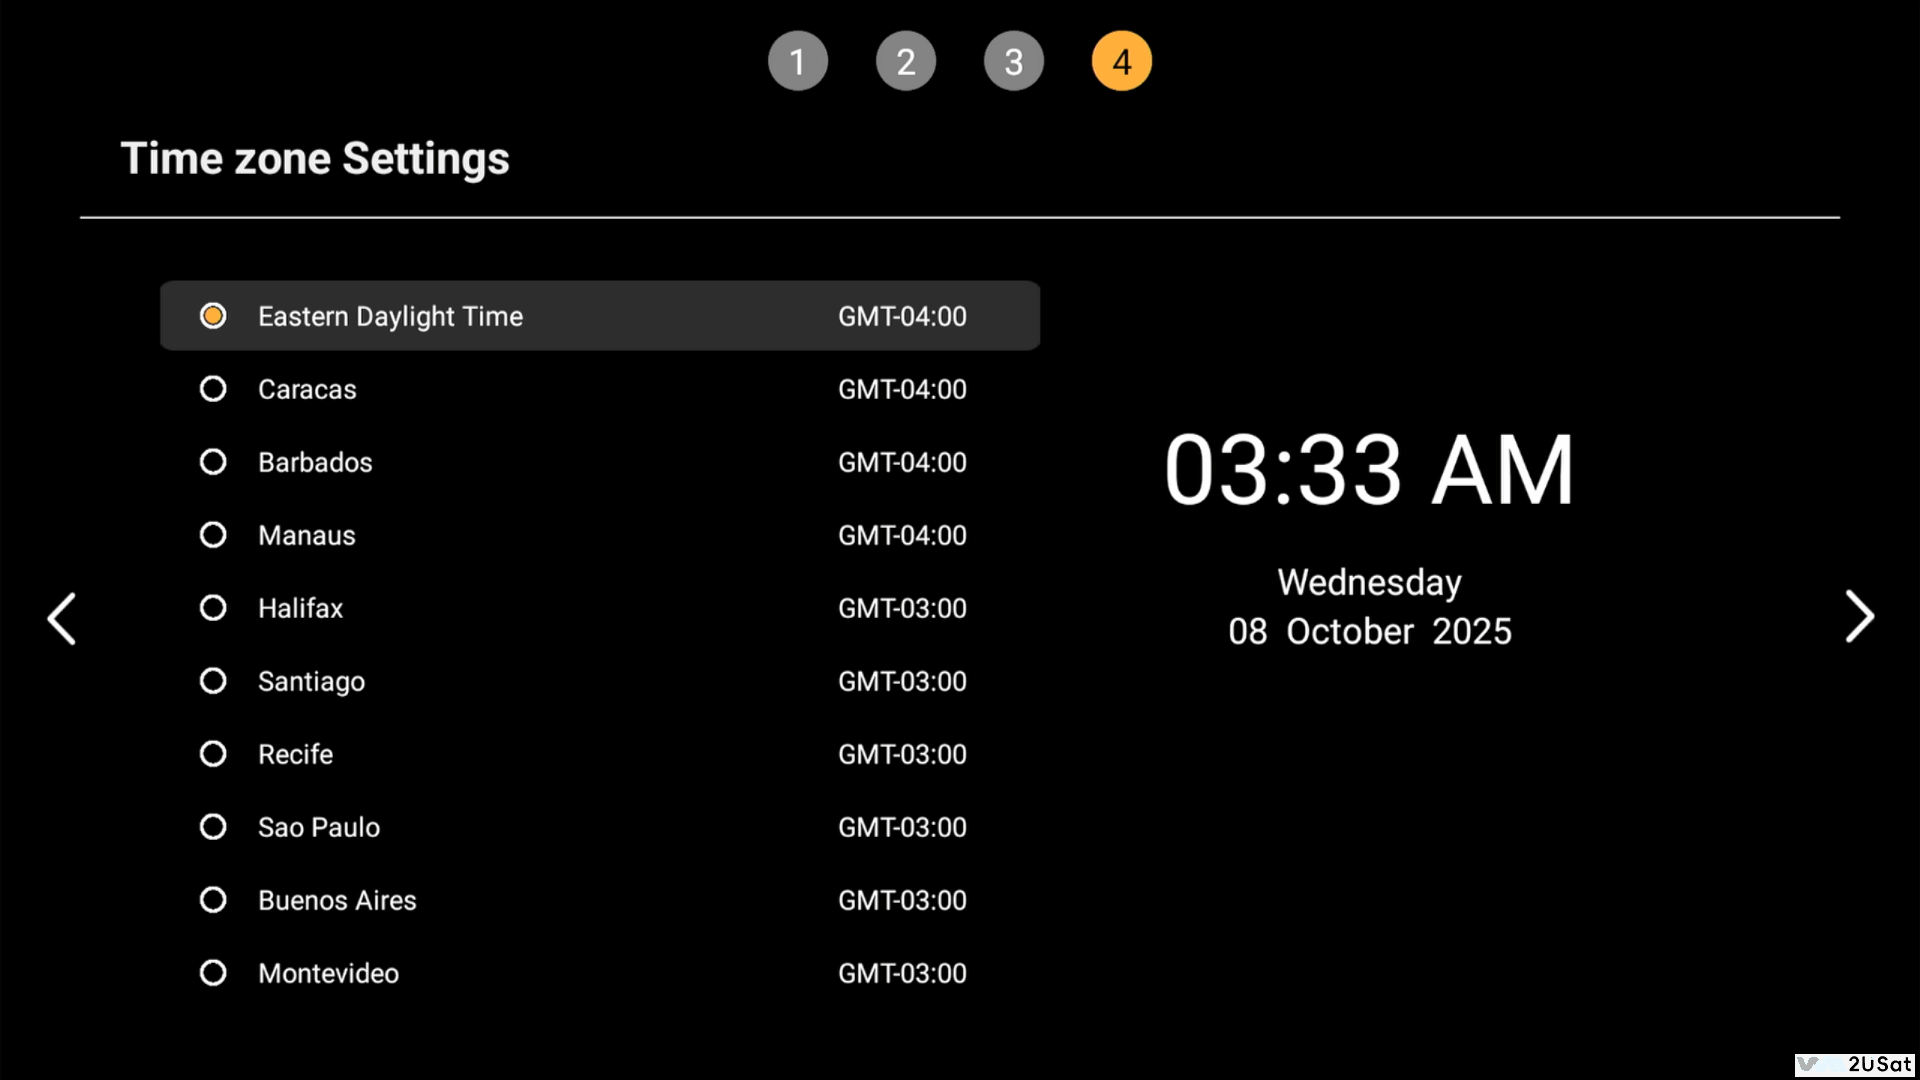
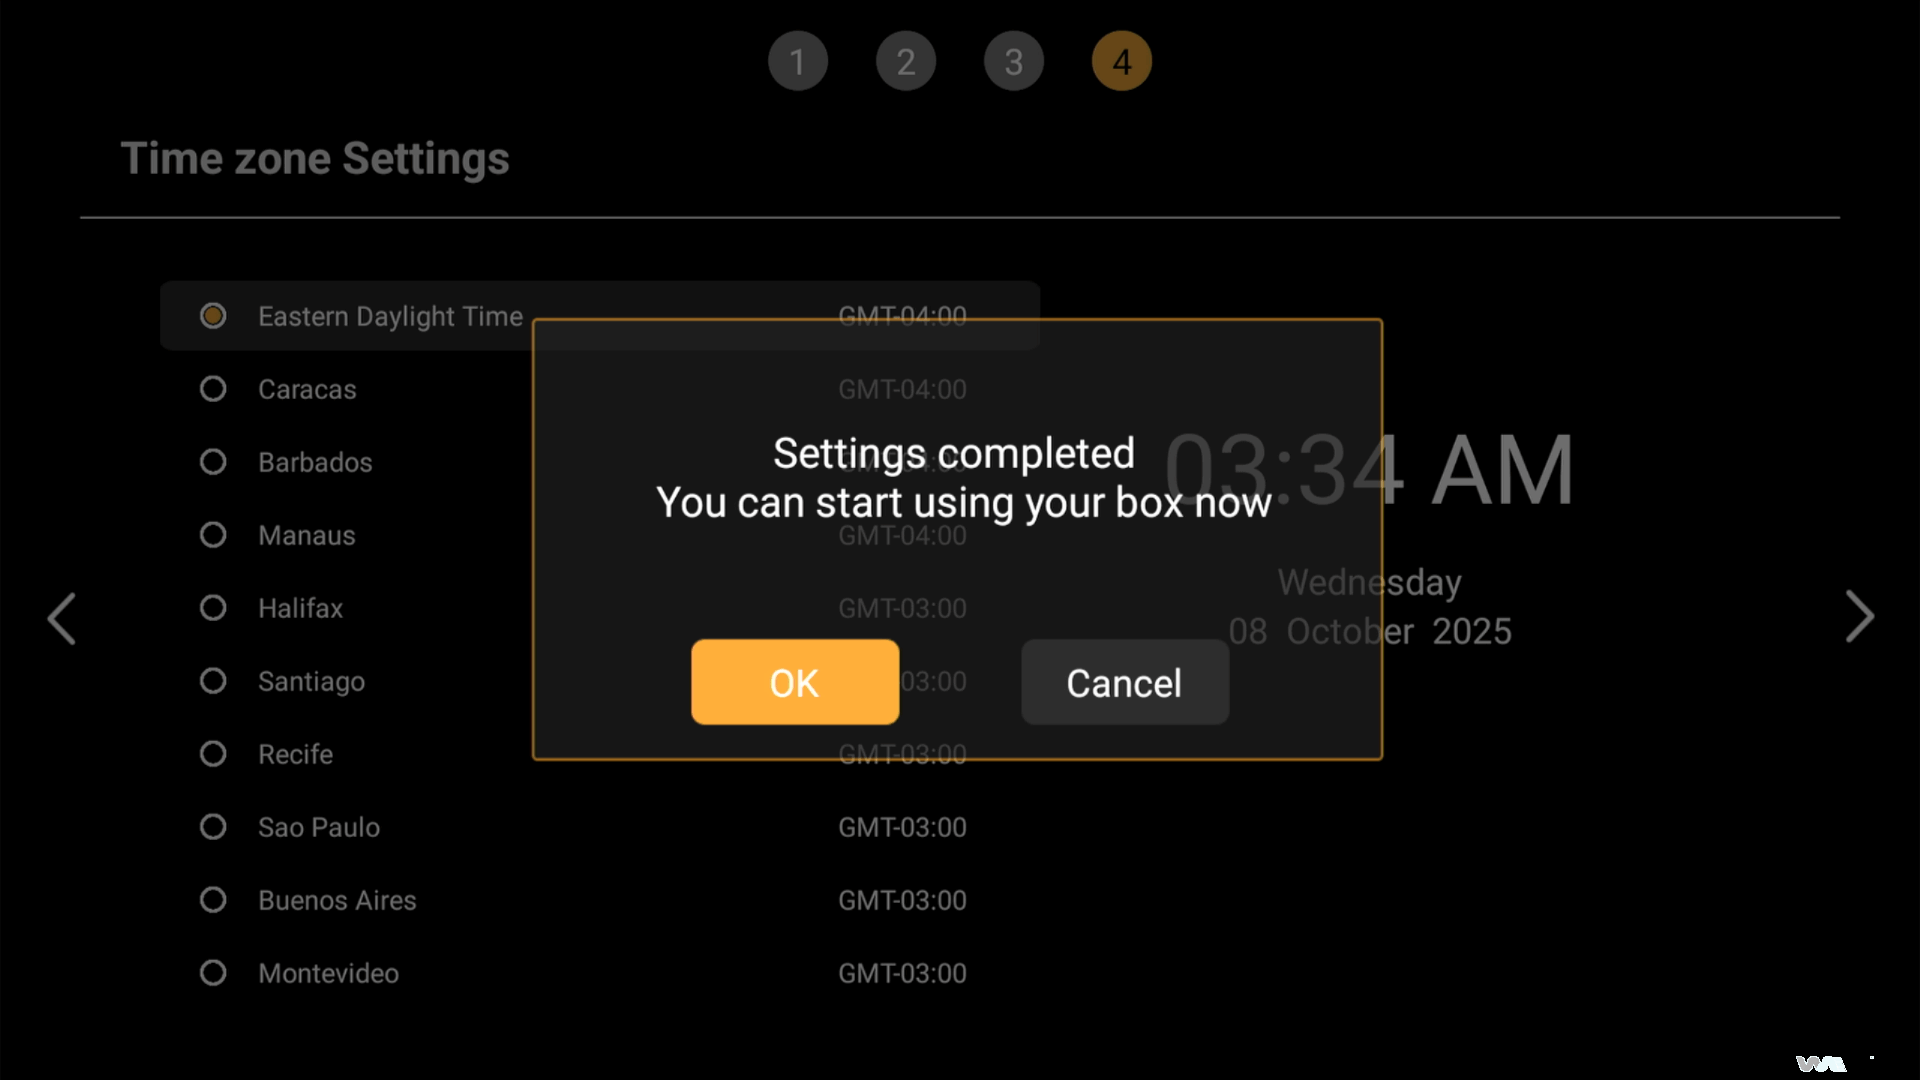
Step 6: Set Time Zone
1. In the “Time Zone Selection” interface, common time zones will be listed.
2. Use the 【Up/Down】 arrow keys to find and select your country/region’s time zone.
3. Press 【OK】 to confirm. The system will automatically synchronize the network time.
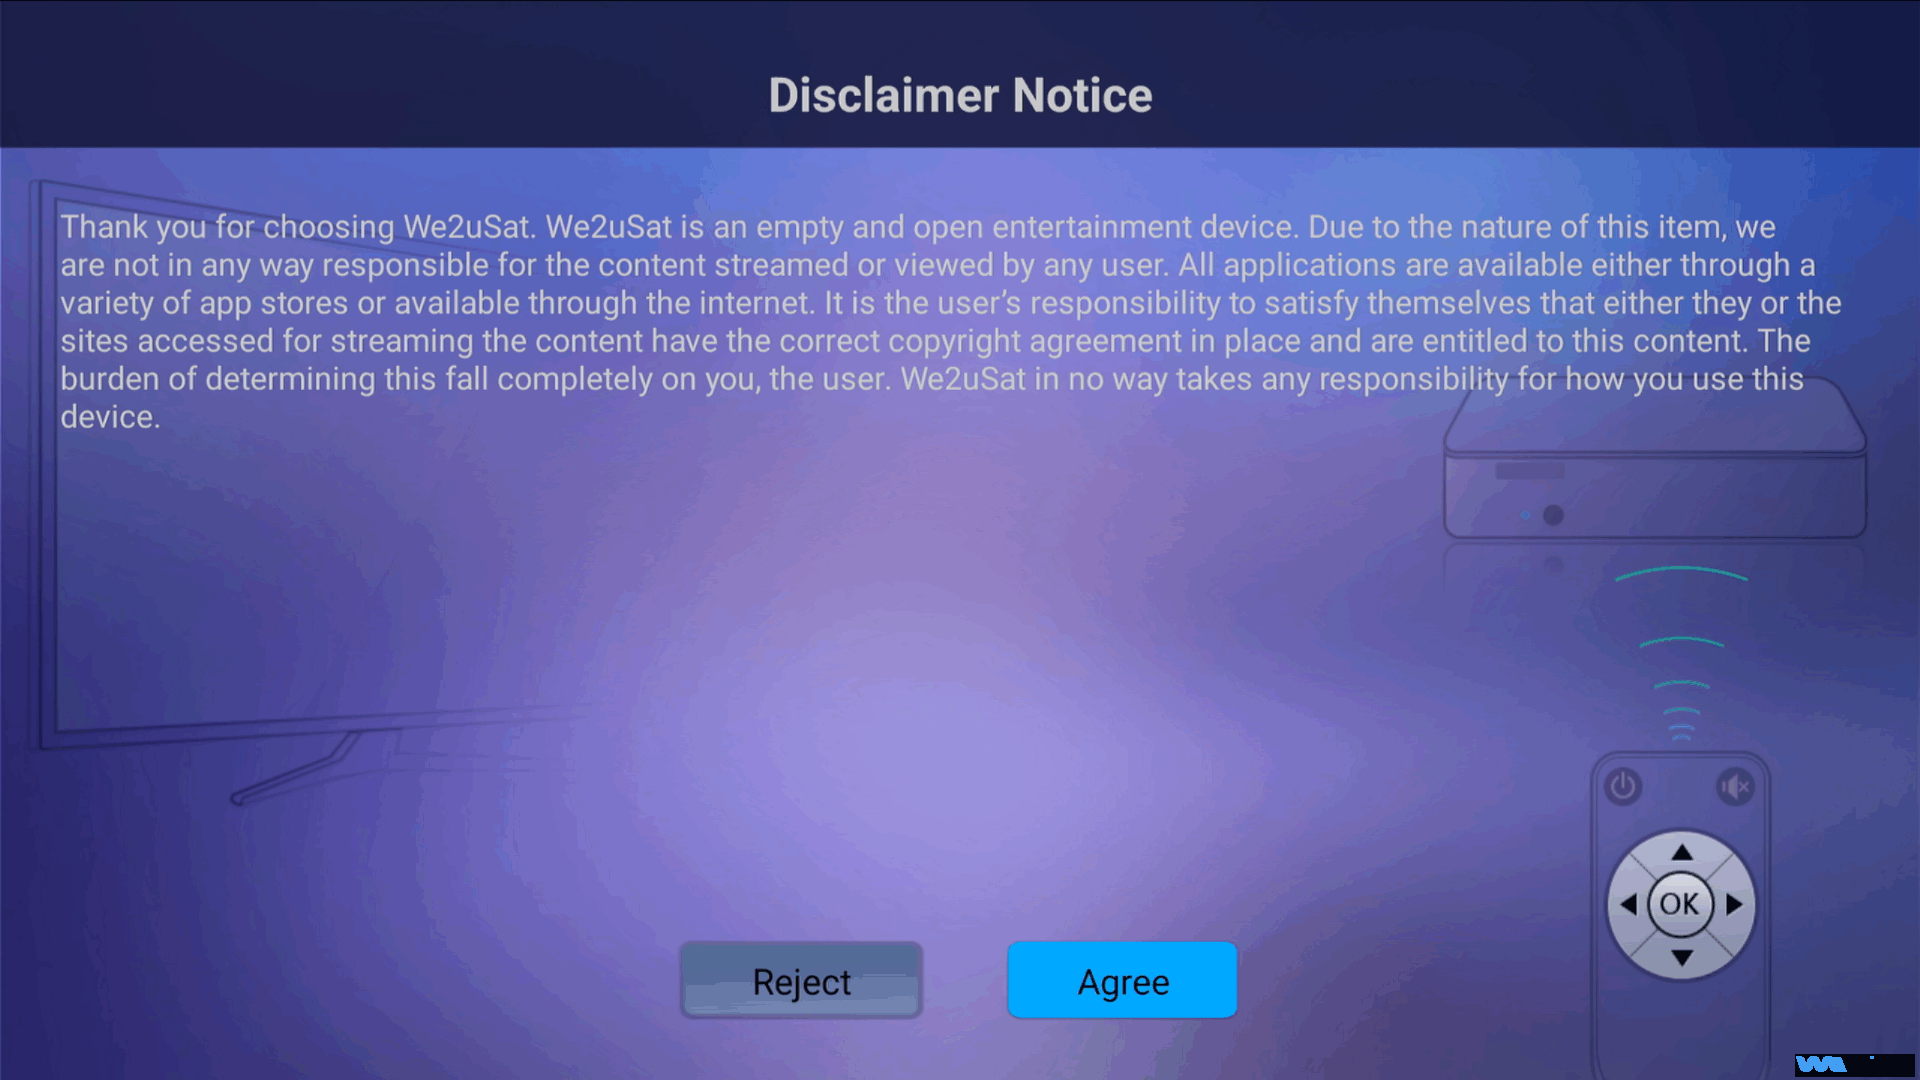
Step 7: Review User Agreement & Confirm
1. You will see the “User Agreement & Privacy Policy” screen, displaying we2usat’s terms of use and privacy notice (including data collection scope and usage). We recommend reading it carefully (use 【Up/Down】 arrows to scroll).
2. After reading, press the 【Down】 arrow key to move the cursor to the “Agree” button. Please note that you must agree to proceed with the setup.
3. Press 【OK】 to confirm your agreement. The system will record your choice and move to network configuration.
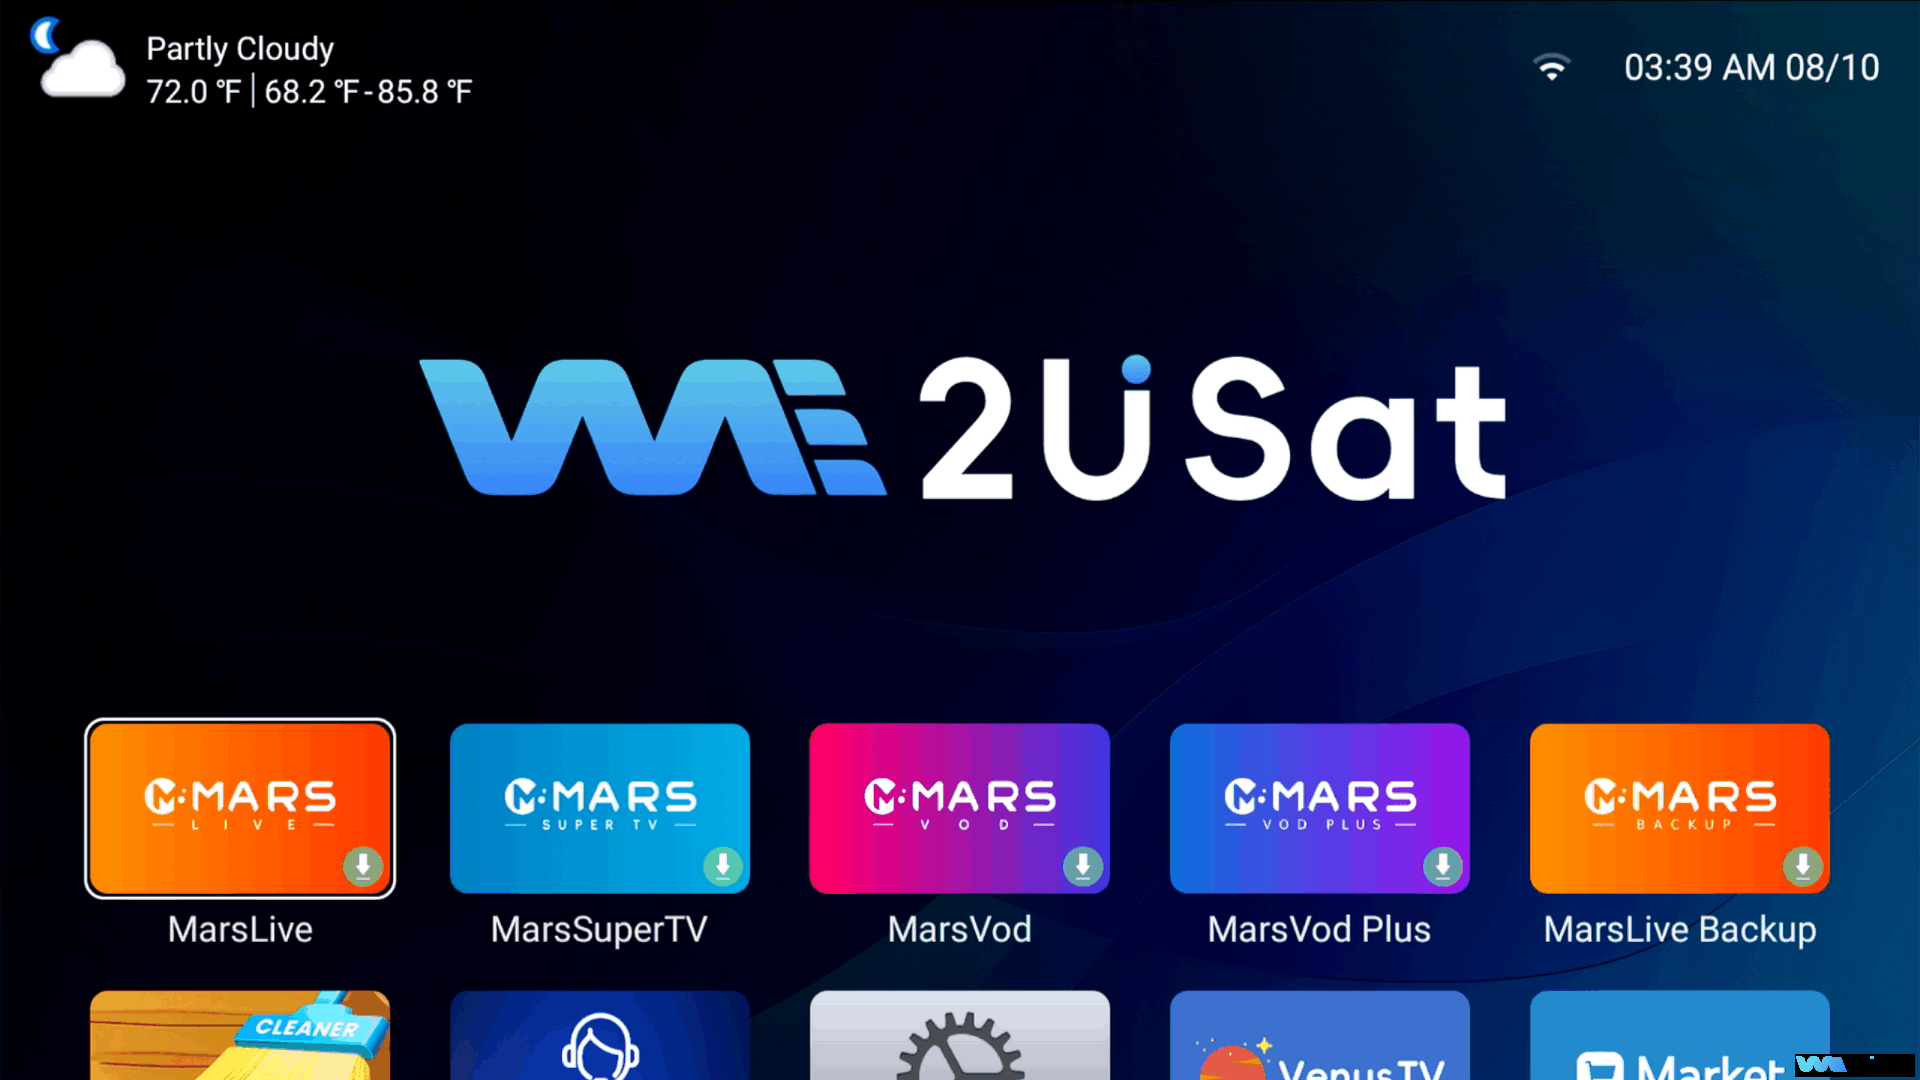
4. Automatic Finalization
Once successfully connected to WiFi, the remaining configuration will be handled automatically by the system. Please be patient and do not operate the device during this time.
V. After-Sales Support
If you encounter any of the following issues (or other questions) during the setup process, please feel free to contact our service team at any time. We will provide you with professional answers within 24 hours.
Thank you again for your trust and support! We hope the we2usat k3 pro+ brings you a high-quality audio-visual entertainment experience. Enjoy your use!

FAQ
1.Power indicator does not light up after connecting to power, and the main unit fails
to start Check if the cables are connected securely—unplug and reinsert them.
2.Remote control pairing fails multiple times, and cannot control the screen
When pairing, make sure to press and hold both the 【OK】 button and 【-】 button for 3 seconds (do not press and release quickly). Also, point the remote directly at the device, with no obstacles in between (obstacles may block signal reception).
3.System cannot enter the home screen after successful WiFi connection
When turning on the device for the first time, the system needs to automatically complete subsequent settings, which may be affected by network quality. Please wait patiently.